Meray

How to Do Crochet Honeycomb Stitch

Merayca Merayca - - 6 dk okuma süresi
19 0

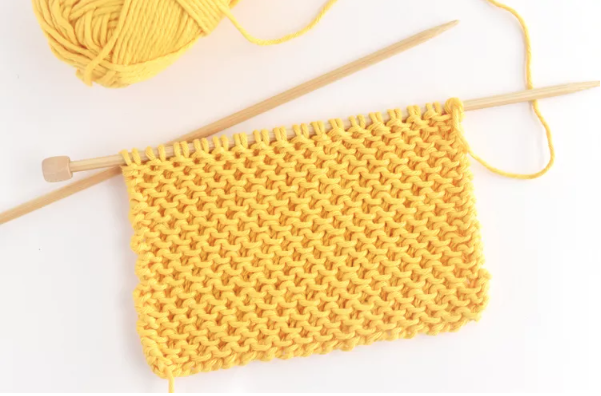
Looking to introduce some dimension and a touch of sweetness to your knitting? Discover the honeycomb stitch! This straightforward stitch pattern blends knit and slipped stitches, resulting in a design that’s certainly friendly for bees!

This pattern is also referred to as loop stitch, but there’s another variety of loop stitch you can explore (which forms long loops of yarn), leading to some naming confusion. Moreover, the design here doesn’t appear particularly loopy. Instead, honeycomb stitch aptly captures the soft and delicate hexagonal texture achieved through slipping stitches.

The alternation of full knitting rows with rows of knit and slipped stitches creates a honeycomb effect on the front and a backside resembling a mix of garter stitch and seed stitch. Due to this characteristic, the fundamental version of the stitch pattern is most effective when knitted flat. When you prefer knitting in the round, you’ll need to modify the pattern and incorporate purl stitches on the even-numbered rows.

You can knit the honeycomb stitch pattern with any odd number of stitches, so cast on some stitches for a swatch and give this a whirl!


Row One
Knit each stitch. (We mentioned this is straightforward!)

Row Two
Knit 1. *Slip 1 stitch purlwise with the yarn positioned at the back. Knit 1. Continue from * across the row.

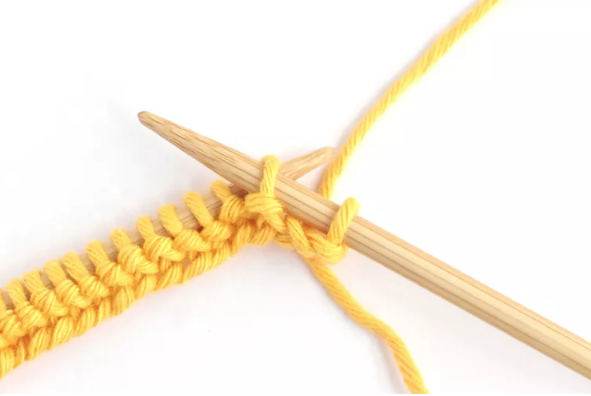
If you’re unfamiliar with slipping stitches, gently slide the tip of your right needle beneath the next stitch on the left needle as if you’re about to purl it. Ensure your working yarn remains at the back, as when you perform knit stitches. Shift the stitch to your right needle without altering it in any way. That’s all there is to it!

As you proceed across the row, slipping and knitting each stitch, you should notice that the stitches tend to pair up in twos.

Row Three
Knit every stitch.

Row Four

Knit 2. *Slip 1 stitch purlwise with the yarn positioned at the back. Knit 1. Continue from * until the end of the row, concluding with one final knit stitch.

The two knits at the start and end of this row contribute to the staggered honeycomb texture.

Similar to the end of row 2, you should observe the stitches grouped in pairs.

Rows 1 and 3 represent the right side of your knitting while rows 2 and 4 are the wrong side. By the time you complete row 4, flipping your work over to commence the next repeat will reveal the pattern beginning to take shape.

Repeat rows 1 to 4 until your work attains the desired dimensions. Here’s the condensed version:

Row 1: K.
Row 2: K1. *Sl1 wyib. K1. Rep from *.
Row 3: K.
Row 4: K2. *Sl1 wyib. K1. Rep from * to last st. K1.

Due to its straightforward repetition, it’s simple to memorize and knit while enjoying a movie or commuting. The only thing to keep an eye on is which row you’re currently on, as it can be challenging to determine if you need to execute row 2 or 4 after a knit row. Utilize a row counter to maintain awareness of your progress!

The longer horizontal stitches that create the lower curve on each row on the front side of your knitting emerge when your yarn is kept behind the slipped stitches. It’s remarkable how a minor adjustment can transform the appearance of basic knitted rows!

The backside of the honeycomb stitch retains a resemblance to garter stitch, yet the texture appears bumpier. You can leverage both sides by crafting a dish or face cloth that has contrasting functionalities!

Another advantage of the honeycomb stitch pattern is that the edges remain flat, unlike stockinette stitch. This makes it perfect for crafting items where you don’t want an additional border of stitches. And, given its simplicity, it can be applied in instances where you might typically select garter stitch. Just be sure to check your gauge since it will vary slightly.

And if you wish to alter it even further, consider working it on larger needles for a more open appearance!

İlgili Yazılar

Bir yanıt yazın

E-posta adresiniz yayınlanmayacak. Gerekli alanlar * ile işaretlenmişlerdir