Designer :
Instagram: @bumbee_crochet
Hello everyone who loves amigurumi…
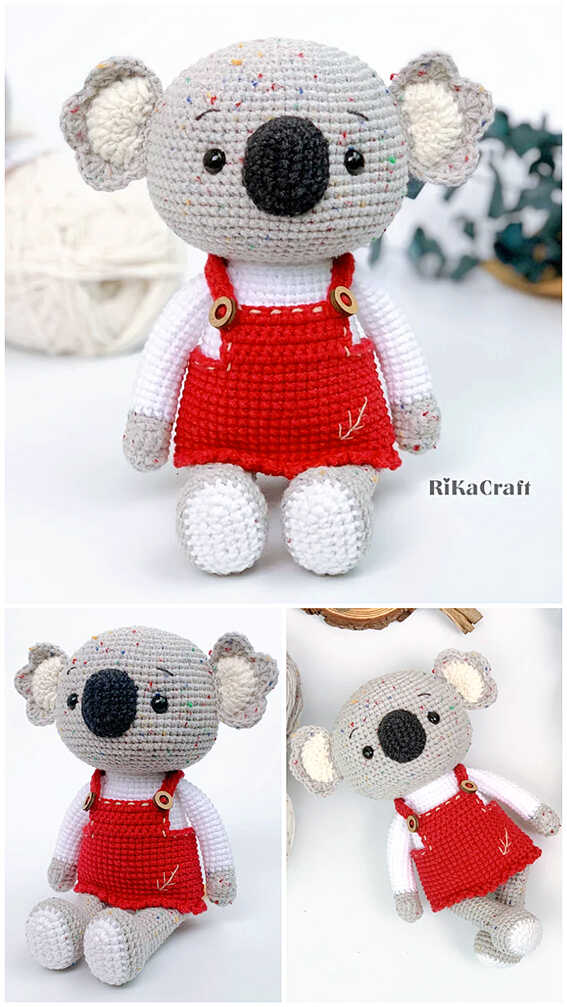
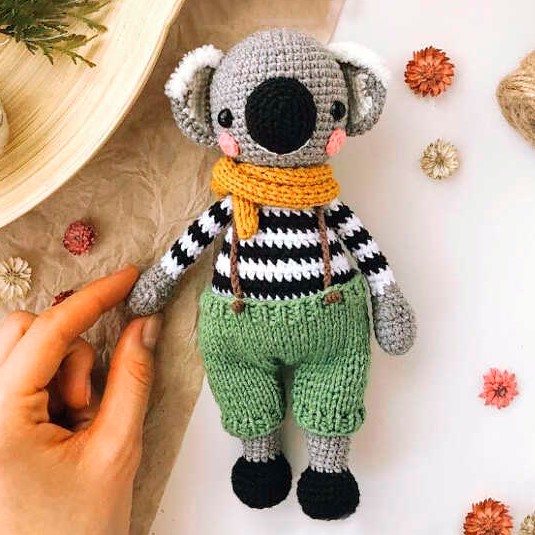
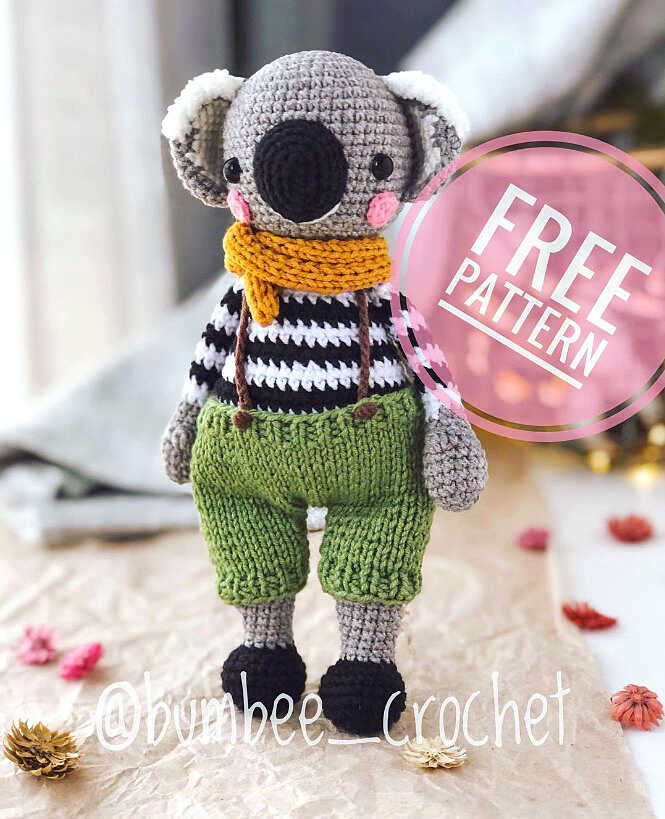
Today I shared the amigurumi koala crochet pattern for you. Below you will find a step-by-step tutorial of this pattern and you will complete it without any difficulty. Thanks to the creator for this cute pattern.
Materials and tools
Alize Cotton Gold yarn for koala and panties
Hook 2.0 mm
Knitting needles 2.5 mm for pants
Safety eyes
Needles and scissors
Holofiber
Abbreviations
sc : Single Crochet
inc : Increase
dec : Decrease
tr : Triple Crochet/ Treble Crochet
st: Stitch
dc : Double Crochet
hdc: Half Double Crochet
sl-st : Slip Stitch
ch : Chain
..in : make increase into same stitch as many as the number which is given in front of “inc” abbreviation (exp; 3inc, 4inc..).
FLO : Crochet into front loops only
BLO : Crochet into back loops only
BL : Bobble Stitch – do 5dc all in the same stitch and then yarn over and pull through all the loops on your hook (the original loop + 1 loop for each partially completed dc).
PSP – knitting by the front wall of the loop (only in the row where PSP is written)
ZSP – knitting behind the back wall of the loop (only in the row where ZSP is written)
*The height of the finished knitted toy is about 22 cm.
Bu Yazımızda Neler Var :
CROCHET KOALA AMIGURUMI FREE PATTERN
Head
1. 6 sc in MR
2. inc*6 (12 sc)
3. (1 sc, inc)*6 (18 sc)
4. (2 sc, inc)*6 (24 sc)
5. (3 sc, inc)*6 (30 sc)
6. (4 sc, inc)*6 (36 sc)
7. (5 sc, inc)*6 (42 sc)
8. (6 sc, inc)*6 (48 sc)
9-19. 48 sc (11 rows)
20. (6 sc, dec)*6 (42 sc)
21. (5 sc, dec)*6 (36 sc)
22. (4 sc, dec)*6 (30 sc)
23. (3 sc, dec)*6 (24 sc)
24. (2 sc, dec)*6 (18 sc)
sl st and cut the thread. Stuff your head.
Insert the eyes between 15 and 16 rows.
Nose
5 ch, from the second loop from the hook we knit:
1.3 sc, 3 sc in 1 loop, on the second side ch – 2 sc, inc (10 sc)
2. inc, 2 sc, inc*3, 2 sc, inc*2 (16 sc)
3. 1 sc, inc, 2 sc, (1 sc, inc)*3, 2 sc, (1 sc, inc)*2 (22 sc)
4-5. 22 sc (2 row)
sl st and cut the thread, leaving the long end to be sewn on.
Cheeks (2 parts)
8 sc in MR
Ss and cut the thread, leaving the end for sewing.
Ears (2 parts)
c- gray color, b- white color
1. с- 6 sc in MR
2. с- inc*6 (12 sc)
3. с- (1 sc, inc)*4, b- (1 sc, inc)*2 (18 sc)
4. с- (2 sc, inc)*4, b- (2 sc, inc)*2 (24 sc)
5. с- (3 sc, inc)*4, b- (3 sc, inc)*2 (30 sc)
6. с- 20 sc, b- 10 sc (30 sc)
7. с- 20 sc, b- 10 sc (30 sc)
Knit in gray 2 sc, fold in half and knit at both ends (in gray) 15 sc.
Cut the thread, leaving a long end for sewing.
Along the upper edge of the ear can be made 5-6 sc of Alize Softy if desired.
Hands (2 parts)
1. 6 sc in MR
2. inc*6 (12 sc)
3. (3 sc, inc)*3 (15 sc)
4-6. 15 sc (3 row)
7.Lush column of 3 hdc with a common top, 1 sc, dec, 3 sc, dec, 3 sc, dec, 1 sc (12 sc)
8. 12 sc
9. (2 sc, dec)*3 (9 sc)
10. 9 sc
color change to white. Next, alternate white and black every two rows.
11-26. 9 sc (16 row)
Knit if multiple sc offsets are needed.
Fold in half and knit both sides together 4 sc.
The legs and body of the toy are knitted in one piece.
Legs (2 parts)
Start with a black thread
1. 6 sc in MR
2. inc*6 (12 sc)
3. (1 sc, inc)*6 (18 sc)
4. (2 sc, inc)*6 (24 sc)
5-7. 24 sc (3 row)
8. 3 sc, (1 sc, dec)*6, 3 sc (18 sc)
9. 3 sc, dec*6, 3 sc (12 sc)
Change color to gray
10-12. 12 sc (3 row)
13. (3 sc, inc)*3 (15 sc)
14-24. 15 sc (11 row)
Work multiple sc offsets (I have 4 sc), fold in half and knit both sides of 7 sc together.
Cut the thread on the first leg. On the second, we do not cut, we continue to knit the body.
Body
We collect 4 ch from the first leg, attach the second leg and knit
25.7 sc for the front walls of the hinges, 7 sc and the back walls of the hinges, 4 sc along the ch, 7 sc behind the PSP, 7 sc behind the ZSP, 4 sc along the ch (36 sc)
26. 36 sc
27. (5 sc, inc)*6 (42 sc)
28. 12 sc, (1 sc, inc)*3, (inc, 1 sc)*3, 18 sc (48 sc)
29-32. 48 sc
Change the color to white. Next, alternate white and black every two rows.
33-35. 48 sc
36. (6 sc, dec)*6 (42 sc)
37-38. 42 sc
39. (5 sc, dec)*6 (36 sc)
40 — 41. 36 sc
42. (4 sc, dec)*6 (30 sc)
43 — 44. 30 sc
45. (3 sc, dec)*6 (24 sc)
46 — 47. 24 sc
48. (2 sc, dec)*6 (18 sc)
49-50. 18 sc
sl st and cut the thread, leaving the long end to be sewn on.
First, you need to calculate how many loops you need to dial for the panties. To do this, you need to make a sample of 10 loops – 10 rows and measure its length and width. I got 3 cm long. Now you need to measure the waist of the koala (I have 17 cm).
The number of panties loops is calculated using the formula.
Waist circumference * 10 / sample length
17 * 10/3 = 56.6
I rounded to 56 stitches.
Now you need to measure the distance between the legs and calculate the number of loops in the same way.
I have ~ 1.7 cm ->
1.7 * 10/3 = 5.6
I have rounded up to 6 stitches for convenience. The number must be divisible by 2.
Now we collect 56 loops and knit:
1-3. Elastic band 1×1 (3 row)
4-n. Front surface
(Knit to the length you need. I have 25 rows).
In the next row, you will first need to close half of the loops that we calculated between the legs (I have 3 loops).
Next, you need the knitting needles.
For the leg, the number of loops must be calculated by dividing the total number of loops by 2 and subtracting the number of loops between the legs.
56 p / 2-6 = 22 loops.
26.3 p-close, 22 p-knit
27-37. 22 stitches with front stitch. (I have 11 rows. You can have more or less depending on the length you want).
38-40. elastic band 1×1 (3 rows)
41. Close 22 loops.
Pass a cldecok over the last stitch and crochet 8-9 sc back to row 26. Alternatively: cut the thread and attach to row 26.
We knit the second leg.
26.6 p-close, 22 p-knit
27-37. 22 sts with front stitch (11 rows)
38-40. Elastic band 1×1 (3 rows)
41. Close 22 loops.
Pass a cldecok through the last stitch and crochet 8-9 sc back to row 26.
Close the remaining 3 loops in the 26th row.
Sew the trousers.
Congratulations, you have completed the amigurumi koala pattern.
More amigurumi koala ideas:

